在本教程中,我们将向您展示如何在 CentOS 8 上安装 LibreNMS。对于那些不知道的人,LibreNMS 是一个针对服务器和网络硬件的开源自动发现网络监控工具。 它支持广泛的网络硬件,如 Cisco、Juniper、Brocade、Foundry、HP,以及包括 Linux 和 Windows 在内的操作系统。 LibraNMS 是网络监控工具“Observium”的基于社区的分支,在 GPLv3 下发布。
本文假设您至少具备 Linux 的基本知识,知道如何使用 shell,最重要的是,您将网站托管在自己的 VPS 上。 安装非常简单,假设您在 root 帐户下运行,如果不是,您可能需要添加 ‘sudo‘ 到命令以获取 root 权限。 我将逐步向您展示在 CentOS 8 上安装 LibreNMS 网络监控工具的过程。
在 CentOS 8 上安装 LibreNMS
第 1 步。首先,让我们首先确保您的系统是最新的并安装所有必需的依赖项。
sudo dnf install epel-release sudo dnf update
步骤 2. 安装 LEMP 堆栈。
需要 CentOS LEMP 服务器。 如果您没有安装 LEMP,您可以在此处按照我们的指南进行操作。
步骤 3. 在 CentOS 8 上安装 LibreNMS。
现在我们从 GitHub 克隆 LibreNMS 软件,如下所示:
cd /opt git clone https://github.com/librenms/librenms.git
我们将需要更改一些文件夹权限:
chown -R librenms:librenms /opt/librenms chmod 770 /opt/librenms setfacl -d -m g::rwx /opt/librenms/rrd /opt/librenms/logs /opt/librenms/bootstrap/cache/ /opt/librenms/storage/ /opt/librenms/cache setfacl -R -m g::rwx /opt/librenms/rrd /opt/librenms/logs /opt/librenms/bootstrap/cache/ /opt/librenms/storage/ /opt/librenms/cache
步骤 4. 运行 Composer Wrapper。
运行以下命令来运行 composer 包装器脚本:
cd /opt/librenms curl -sS https://getcomposer.org/installer | php su - librenms ./scripts/composer_wrapper.php install --no-dev
步骤 5. 为 LibreNMS 配置 MariaDB。
默认情况下,MariaDB 未加固。 您可以使用 mysql_secure_installation 脚本。 您应该仔细阅读以下每个步骤,这些步骤将设置 root 密码、删除匿名用户、禁止远程 root 登录、删除测试数据库和访问安全 MariaDB:
mysql_secure_installation
像这样配置它:
- Set root password? [Y/n] y - Remove anonymous users? [Y/n] y - Disallow root login remotely? [Y/n] y - Remove test database and access to it? [Y/n] y - Reload privilege tables now? [Y/n] y
接下来,我们需要登录 MariaDB 控制台并为 LibreNMS 创建一个数据库。 运行以下命令:
mysql -u root -p
这将提示您输入密码,因此输入您的 MariaDB 根密码并点击 Enter. 登录到数据库服务器后,您需要为 LibreNMS 安装创建一个数据库:
MariaDB [(none)]> CREATE DATABASE librenms CHARACTER SET utf8 COLLATE utf8_unicode_ci; MariaDB [(none)]> CREATE USER 'librenms'@'localhost' IDENTIFIED BY 'YOUR-PASSWD'; MariaDB [(none)]> GRANT ALL PRIVILEGES ON librenms.* TO 'librenms'@'localhost'; MariaDB [(none)]> FLUSH PRIVILEGES; MariaDB [(none)]> exit
完成后,打开 MariaDB 配置文件并在下面添加以下行 [mysqld] 部分:
nano /etc/my.cnf
内 [mysqld] 部分请补充:
innodb_file_per_table=1 lower_case_table_names=0
然后,重新启动 MariaDB 以使更改生效:
sudo systemctl restart mariadb
步骤 6. 配置 PHP。
现在我们编辑 php.ini 到您的首选时区:
nano /etc/php.ini
添加以下行:
date.timezone = Asia/Jakarta
步骤 5. 为 LibreNMS 配置 Nginx。
让我们为 LibreNMS 使用的 Nginx 创建 VirtualHost 定义:
/etc/nginx/conf.d/librenms.conf
将以下内容添加到配置文件中:
server { listen 80; server_name librenms.idroot.us; root /opt/librenms/html; index index.php; charset utf-8; gzip on; gzip_types text/css application/javascript text/javascript application/x-javascript image/svg+xml text/plain text/xsd text/xsl text/xml image/x-icon; location / { try_files $uri $uri/ /index.php?$query_string; } location /api/v0 { try_files $uri $uri/ /api_v0.php?$query_string; } location ~ .php { include fastcgi.conf; fastcgi_split_path_info ^(.+.php)(/.+)$; fastcgi_pass unix:/run/php-fpm/php-fpm.sock; } location ~ /.ht { deny all; } }
现在,我们可以重新启动 Nginx Web 服务器,以便进行更改:
sudo systemctl restart nginx
步骤 6. 配置防火墙。
允许 Nginx 通过防火墙,以便用户能够从外部机器访问 LibreNMS 门户:
sudo firewall-cmd --zone public --add-service http sudo firewall-cmd --permanent --zone public --add-service http sudo firewall-cmd --reload
步骤 7. 在 CentOS 系统上访问 LibreNMS Web 界面。
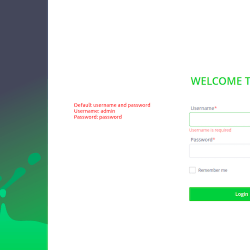
默认情况下,LibreNMS 将在 HTTP 端口 80 上可用。 打开您喜欢的浏览器并导航到 https://your-domain.com/install.php 或者 https://server-ip-address/install.php 并完成所需的步骤以完成安装。
恭喜! 您已成功安装 LibreNMS。 感谢您使用本教程在您的 CentOS 8 系统上安装 LibreNMS 网络监控工具。 如需其他帮助或有用信息,我们建议您查看 LibreNMS 官方网站.


