OpenStack 是一个开源平台,主要用于通过 Web 浏览器仪表板或命令行管理云环境的硬件、存储和网络设置。 除了管理您的云之外,您还可以构建和部署您的实例。
在本教程中,我们将介绍如何在 CentOS 7 上安装 OpenStack。我们将在非托管 CentOS 7 服务器上以 root 用户身份登录,只有 灯堆栈 安装在它上面。
OpenStack 安装
1. 验证您的服务器的初始配置
在安装之前,通过运行 yum update 命令确保服务器上的所有内容都是最新的。 此命令将检查存储库并通知您是否需要更新任何内容。
[[email protected] ~]# yum update下面的提示将指示运行 yum 命令后有多少软件包需要更新。 按 y 然后 Enter 安装必要的软件包。
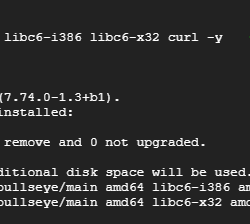
Transaction Summary ========================================================================================================== Install 2 Packages (+1 Dependent package) Upgrade 171 Packages Total download size: 606 M Is this ok [y/d/N]: 禁用不必要的服务
通过运行以下命令停止和禁用我们不需要的任何服务。
[[email protected] ~]# ss -tulpn该命令的结果将显示所有正在运行的服务及其正在侦听的端口的列表,具体取决于您的服务器上正在运行的服务。
Netid State Recv-Q Send-Q Local Address:Port Peer Address:Port udp UNCONN 0 0 *:48219 *:* users:(("haproxy",pid=71524,fd=6),("haproxy",pid=71523,fd=6)) tcp LISTEN 0 128 *:22 *:* users:(("sshd",pid=940,fd=3)) tcp LISTEN 0 100 127.0.0.1:25 : users:(("master",pid=71392,fd=13)) tcp LISTEN 0 128 *:5000 *:* users:(("haproxy",pid=71524,fd=5)) tcp LISTEN 0 128 [::]:22 [::]:* users:(("sshd",pid=940,fd=4)) tcp LISTEN 0 100 [::1]:25 [::]:* users:(("master",pid=71392,fd=14)) tcp LISTEN 0 128 [::ffff:127.0.0.1]:9200 [::]:* users:(("java",pid=45448,fd=254)) tcp LISTEN 0 128 [::1]:9200 [::]:* users:(("java",pid=45448,fd=253)) tcp LISTEN 0 128 [::ffff:127.0.0.1]:9300 [::]:* users:(("java",pid=45448,fd=251)) tcp LISTEN 0 128 [::1]:9300 [::]:* users:(("java",pid=45448,fd=250))只有 SSH 守护进程应该保持活动状态。 因此,我将使用以下命令禁用除 SSH 守护程序之外的所有内容,包括 HAProxy 负载均衡器和 Elasticsearch(在 Java 下运行)。
[[email protected] ~]# systemctl stop haproxy && systemctl disable haproxy; systemctl stop elasticsearch.service && systemctl disable elasticsearch.service禁用所有不必要的服务后,从上面重新运行 ss-tulpn 命令。 如果仅保留 SSH 守护程序,则输出将如下所示。 如果您看到的不仅仅是 SSH 守护程序,请重复禁用过程并重新检查活动服务。
Netid State Recv-Q Send-Q Local Address:Port Peer Address:Port tcp LISTEN 0 128 *:22 *:* users:(("sshd",pid=940,fd=3)) tcp LISTEN 0 128 [::]:22 [::]:* users:(("sshd",pid=940,fd=4))如果 SSH 守护程序是列表中唯一剩下的服务,您就可以进入下一步了。
检查 SELinux 是否已禁用
检查安全性增强的 Linux (SELinux) 通过运行 getenforce 命令在您的服务器上启用。 如果它被禁用,输出将返回 Disabled。
[[email protected] ~]# getenforce Disabled如果 SELinux 仍处于启用状态,输出将返回 Enforcing。
[[email protected] ~]# getenforce Enforcing红帽可以帮助您 将 SELinux 设置为允许或禁用.
设置您的系统主机名
初始配置的最后一步是将主机名设置为与运行 OpenStack 安装的完全限定域名 (FQDN) 相匹配。
将 set-hostname 更改为您首选的主机名。
[[email protected] ~]#hostnamectl set-hostname host.OpenStack.lan由于不会产生任何输出,请使用以下命令验证您是否正确设置了主机名。
[[email protected] ~]# hostname -f输出将显示当前主机名的名称。 如果它显示您首选的主机名,那么您是最新的。
2. 使用 PackStack 包安装 OpenStack
PackStack 在 CentOS 和 Red Hat Enterprise Linux (RHEL) 服务器上部署 OpenStack 的不同组件。 首先,我们需要使用此命令启用 RDO(OpenStack 的 RPM 分发)存储库。
[[email protected] ~]# yum install https://www.rdoproject.org/repos/rdo-release.rpm出现提示时,按 y 然后 Enter 得到下面的结果。
Running transaction Installing : rdo-release-train-1.noarch 1/1 Verifying : rdo-release-train-1.noarch 1/1 Installed: rdo-release.noarch 0:train-1 Complete!现在使用 yum 安装 PackStack 包。 这个命令的输出会比较大。
[[email protected] ~]# yum install openstack-packstack出现下面的输出后,按 y 然后 Enter.
Retrieving key from file:///etc/pki/rpm-gpg/RPM-GPG-KEY-CentOS-SIG-Cloud Importing GPG key 0x764429E6: Userid : "CentOS Cloud SIG (https://wiki.centos.org/SpecialInterestGroup/Cloud) [email protected]" Fingerprint: 736a f511 6d9c 40e2 af6b 074b f9b9 fee7 7644 29e6 Package : rdo-release-train-1.noarch (@/rdo-release) From : /etc/pki/rpm-gpg/RPM-GPG-KEY-CentOS-SIG-Cloud检索到密钥后,您将看到以下输出,表明 PackStack 软件包已安装。
Installed: openstack-packstack.noarch 1:15.0.1-2.el7 Complete!3. OpenStack Cloud 配置文件
创建配置文件
要在 PackStack 中生成配置文件,请运行以下命令。
[[email protected] ~]# packstack --gen-answer-file=$(date +"%d.%m.%y").conf此命令将确保生成的文件包含创建日期,如下所示。
Packstack changed given value to required value /root/.ssh/id_rsa.pub Additional information: Parameter CONFIG_NEUTRON_L2_AGENT: You have chosen OVN Neutron backend. Note that this backend does not support the VPNaaS or FWaaS services. Geneve will be used as the encapsulation method for tenant networks注意:CONFIG_NEUTRON_L2_AGENT 参数会出现在所有遵循本指南的用户面前,是正常的。
使用 ls 命令查找新创建的配置文件。 如下图,我们的配置文件是22.06.21.conf。
[[email protected] ~]# ls 22.06.21.conf haproxy.tar.gz results1.nmap results.gnmap results.xml haproxy-2.3.10 results1.gnmap results1.xml results.nmap编辑配置文件
现在我们将使用文本编辑器来编辑配置文件。 打开 22.06.21.conf 文件并在适当的地方更新任何包含密码的行。
[[email protected] ~]# vi 22.06.21.conf接下来,设置你的公众号 NTP服务器 到一个位置 close 给你。 在我们下面的例子中,我们选择了 美国 池区。
CONFIG_NTP_SERVERS=0.us.pool.ntp.org如下所示更新其余参数,但包含您自己的密码。
CONFIG_PROVISION_DEMO=nCONFIG_KEYSTONE_ADMIN_PW=TeStPASSword234CONFIG_HORIZON_SSL=yCONFIG_MARIADB_PW=TeStPASSword234编辑好后保存 close 在编辑器中使用 :wq 命令的文件。
最后,更新文件以允许 root 登录。 使用编辑器打开文件。
[[email protected] ~]# vi /etc/ssh/sshd_config以井号 (#) 开头的一行代码是代码中的注释,系统不会读取。 删除 PermitRootLogin yes 行前面的井号以使其处于活动状态,如下所示。 Save 您的更改一旦完成。
#LoginGraceTime 2m PermitRootLogin yes #StrictModes yes #MaxAuthTries 6 #MaxSessions 10最后,重新启动 SSH 守护进程。
[[email protected] ~]# systemctl restart sshd4. 如何安装 OpenStack
最后,我们可以开始 OpenStack 安装。 使用刚刚编辑的配置文件并运行以下命令。
[[email protected] ~]# packstack --answer-file 22.06.21.conf安装过程需要一些时间,但您会在整个过程中看到安装的各种服务。 生成的输出如下所示。
Preparing Ceilometer entries [ DONE ] Preparing Aodh entries [ DONE ] Preparing Puppet manifests [ DONE ] Copying Puppet modules and manifests [ DONE ] Applying 209.59.176.93_controller.pp 209.59.176.93_controller.pp: [ DONE ] Applying 209.59.176.93_network.pp 209.59.176.93_network.pp: [ DONE ] Applying 209.59.176.93_compute.pp 209.59.176.93_compute.pp: [ DONE ] Applying Puppet manifests [ DONE ] Finalizing [ DONE ] **** Installation completed successfully ****** Additional information: * File /root/keystonerc_admin has been created on OpenStack client host 209.59.176.93. To use command line tools you need to source the file. * NOTE : A certificate was generated to be used for SSL, You should change the SSL certificate configured in /etc/httpd/conf.d/ssl.conf on 209.59.176.93 to use CA signed cert. * To access the OpenStack Dashboard browse to https://209.59.176.93/dashboard. Please, find your login credentials stored in the keystonerc_admin in your home directory. The installation log file is available at: /var/tmp/packstack/20210622-135452-6hMTPK/openstack-s etup.log5. 启动 OpenStack 仪表板
在浏览器中输入以下内容。 将下面显示的 IP 地址替换为您自己的 IP 地址。
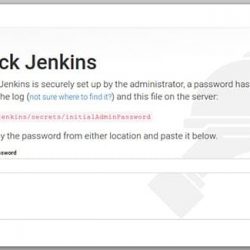
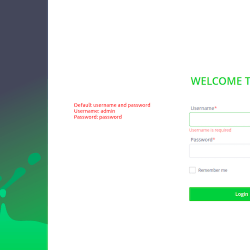
https://209.59.176.93/dashboard将出现 OpenStack 登录屏幕。
输入 admin 作为配置文件中建立的用户名和密码。 点击 登入.
注意:如果您忘记了密码,请在安装 OpenStack 的目录中的 keystonerc_admin 文件中找到它。
成功登录将显示 OpenStack 仪表板。
结论
您已成功在您的服务器上完成 OpenStack 的安装! 我们完全托管的云托管基于 OpenStack 技术构建,让部署可扩展、负载平衡的服务器集群变得轻而易举! 立即联系我们,帮助您选择适合您的云服务器。